
| 일 | 월 | 화 | 수 | 목 | 금 | 토 |
|---|---|---|---|---|---|---|
| 1 | 2 | 3 | 4 | 5 | 6 | |
| 7 | 8 | 9 | 10 | 11 | 12 | 13 |
| 14 | 15 | 16 | 17 | 18 | 19 | 20 |
| 21 | 22 | 23 | 24 | 25 | 26 | 27 |
| 28 | 29 | 30 |
- JavaScript
- 스프링부트
- It
- JS
- 정보처리기사 실기
- useState
- 자바스크립트
- frontend
- 수제비
- spring
- Node.js
- JWT
- spring boot
- 리액트
- Redux
- TS
- 프론트엔드
- 백엔드
- 타입스크립트
- spring boot security
- Front-End
- 웹개발자
- React
- 백엔드개발자
- 큐넷
- TypeScript
- security
- VUE
- 정보처리기사
- Authentication
- Today
- Total
솔적솔적
Spring Boot 프로잭트 생성 본문
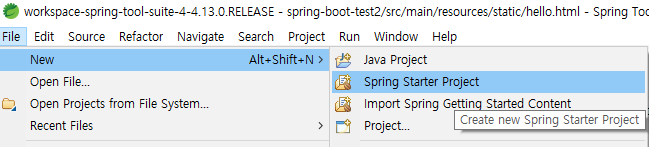
프로젝트 생성하려면 먼저
1. JAVA 11설치
2. IDE: IntelliJ 또는 Eclipse 설치 또는 spring 설치(이걸로 실행 진행)
| 프로젝트 생성
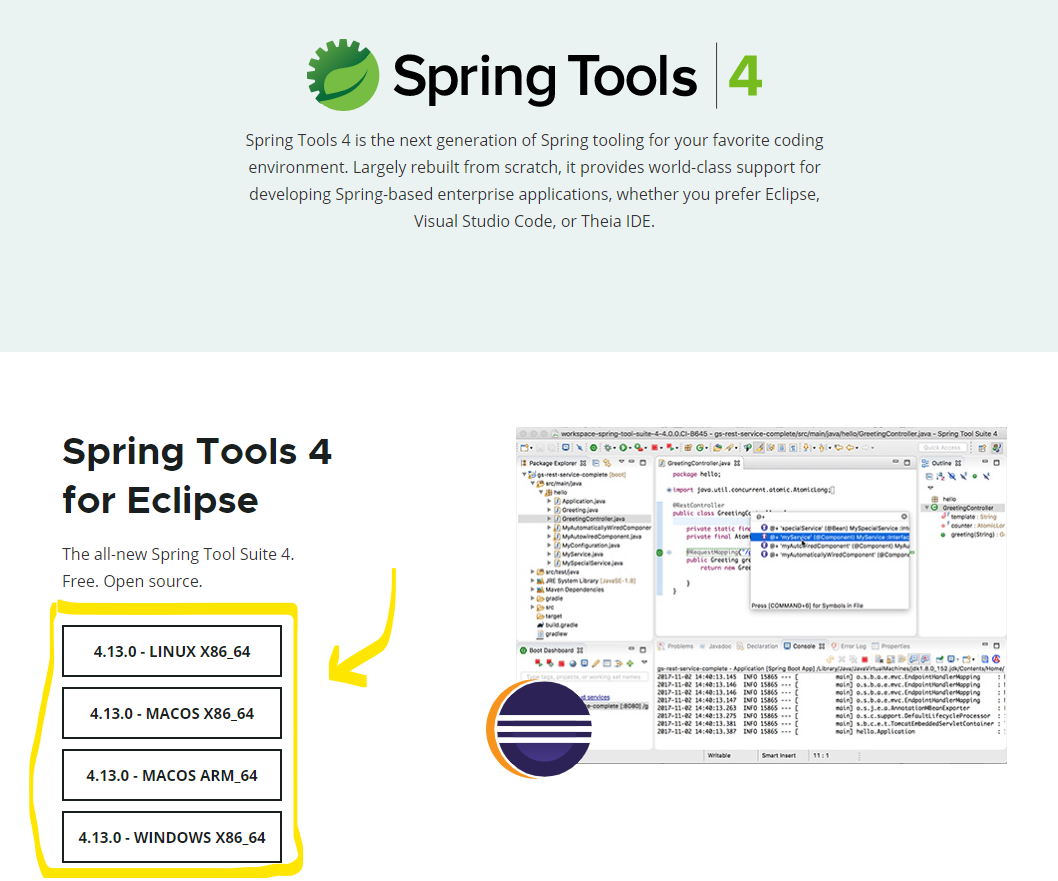
Spring Tools 4 is the next generation of Spring tooling
Largely rebuilt from scratch, Spring Tools 4 provides world-class support for developing Spring-based enterprise applications, whether you prefer Eclipse, Visual Studio Code, or Theia IDE.
spring.io
압축을 풀면

만약 이 SpringToolSuite4가 안보일경우 다시 설치하기(안 보여서 처음부터 설치하니 나옴..)

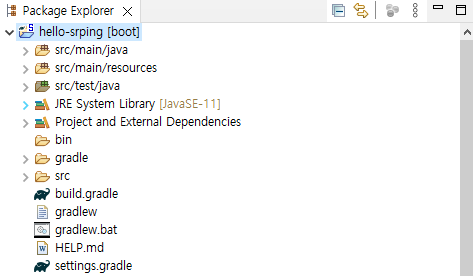
Finish를 누르면 프로젝트가 생성됩니다.


| View 생성
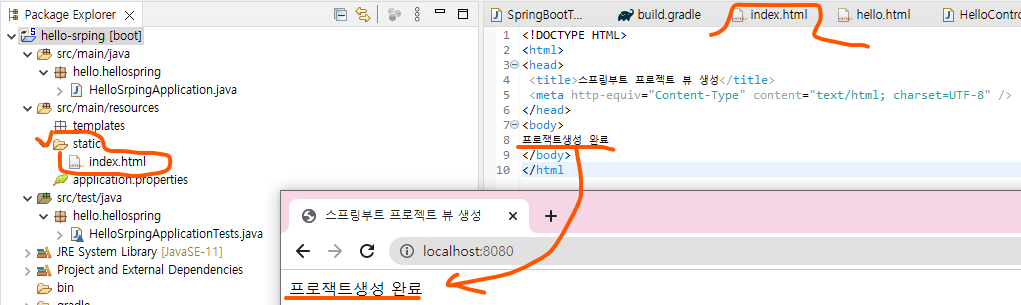
src/main/resources 안에 index.html 생성

src/main/resources/index.html
<!DOCTYPE HTML>
<html>
<head>
<title>스프링부트 프로젝트 뷰 생성</title>
<meta http-equiv="Content-Type" content="text/html; charset=UTF-8" />
</head>
<body>
프로잭트생성 완료
</body>
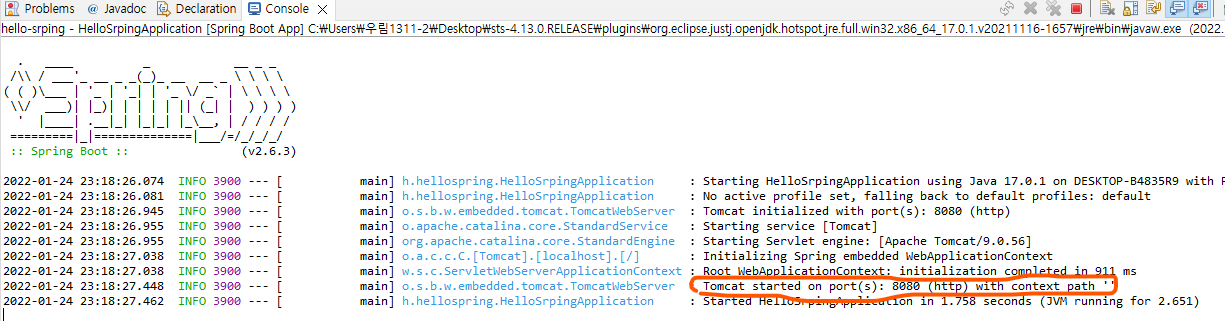
</html다시 실행해보면
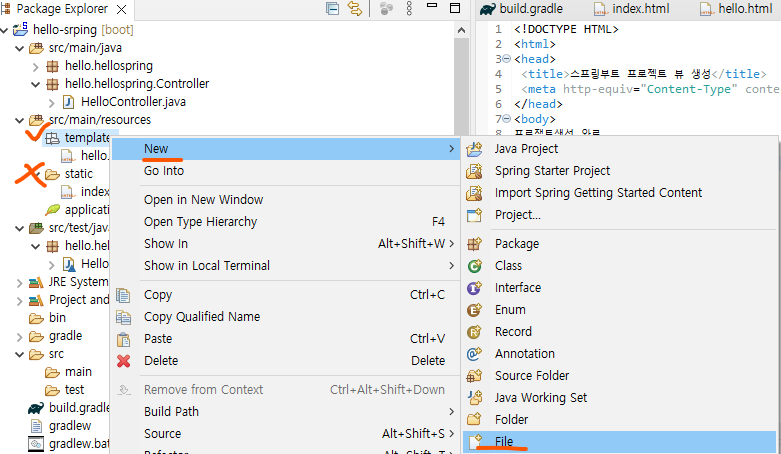
이제 controller를 사용하여 View를 브라우저에 html이 보여지게 해보자.
src/main/java에 패키지 Controller생성 →helloController 생성

src/main/resourses → templates → hello.html 생성

껏다가 다시 실행

spring 사이트에 들어가서 사이트 내에 작성 후 압축파일을 생성하여 import하는 방법도 있다.
| 사이트로 이동해서 스프링 프로젝트 생성하는 방법

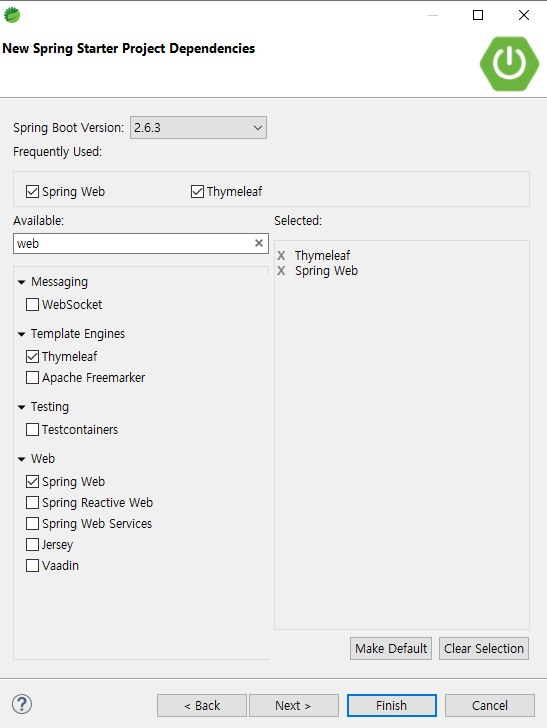
ADD Dependencies 부분 클릭하여
Spring web 그리고 thyme 검색하여 설정


하고 새폴더(작명) 만들고 sts tool에 import하기
[참고자료] 인프런 스프링 입문 - 코드로 배우는 스프링 부트, 웹 MVC, DB 접근 기술
'Back-end > Spring Boot' 카테고리의 다른 글
| Spring Boot 를 배우기 전 알아야 할 개념 정리 1탄 (0) | 2022.03.03 |
|---|---|
| spring boot 프로잭트 생성 시 lombok 설치 방법 (0) | 2022.01.29 |
| 스프렝 웹 개발 - API @ResponseBody (0) | 2022.01.25 |
| 스프링 웹 개발 - 템플릿 엔진 thymeleaf (0) | 2022.01.25 |


